C/C++ based projects on resin.io
I learned about resin.io long time ago (thanks to my friend Shaun Mulligan from resin.io) but didn’t dare to try it out for a long time. Maybe, because most of the examples were in Node.js and targeted Raspberry Pi. At the time, I was doing a project in ad-hoc and wireless sensor networks and implemented it using the Beaglebone Black, Arduino, an LWIR camera (in my case, FLIR Lepton), a reed switch and a pair of XBee modules. I used C/C++ on Beaglebone and with a partner we used Python/Django on Heroku.
By the time I was done with the project and resin.io announced the #blog4swag competition, they supported Beaglebone Black as well. So I decided to see how hard can it be to port a small part of the project to use resin.io?
Here I must say that after I edited the .img file to grant myself SSH access to the host OS and edited the DTB files, I still couldn’t manage to enable the SPI on the Beaglebone that was then running Yocto Linux built by resin.io. Thus, the rest of the article will cover the setup on Rasperry Pi B+.
As I wanted to try porting the application with a minimal effort, I decided to use the original repository, hence the established directory structure.
I started off by adding a Dockerfile to the root directory.
FROM resin/rpi-raspbian:wheezy

RUN apt-get update && apt-get install -y jp2a make imagemagick gcc-4.7 g++-4.7 python2.7
# RUN apt-get install -y cmake libcurl4-openssl-dev libopencv-dev

COPY . /app

WORKDIR /app/sample/lepton-pgm
RUN CC=gcc-4.7 make

CMD modprobe spi-dev
CMD python server.py
There are two interesting parts in the Dockerfile above:
- RUN statements are executed on the resin.io servers and can be cached to speed up subsequent builds. CMD statements are executed on the device when the container is run.
- SPI is enabled via the modprobe spi-dev command.
As I wrote before, the original project streamed the data to a Heroku dyno. However, I was pleasantly surprised to know that resin.io offers the port forwarding to the nodes even behind the NAT, so for my simplistic need I no longer required the cloud-based server.
Instead, I wrote a simple script in Python:
#!/usr/bin/env python

from SimpleHTTPServer import SimpleHTTPRequestHandler
import SocketServer
import subprocess
import urlparse

PORT = 8080

class AsciiHandler(SimpleHTTPRequestHandler):

  def do_GET(self):
    parsedParams = urlparse.urlparse(self.path)

    # request is either for a file to be served up or our page
    if parsedParams.path == "/":

      self.send_response(200)
      self.send_header('Content-Type', 'text/html')
      self.end_headers()
      self.wfile.write("<!DOCTYPE html>");
      self.wfile.write("<html><head></head><body><pre>");

      proc = subprocess.Popen(['./show_ascii'], stdout=subprocess.PIPE)
      while True:
        line = proc.stdout.readline()
        if line != '':
          self.wfile.write(line)
        else:
          break

      self.wfile.write("</pre>")
      self.wfile.write("<br><img src='image.png'>")
      self.wfile.write("</body></html>")
      self.wfile.close()
    else:
      SimpleHTTPRequestHandler.do_GET(self)

httpd = SocketServer.TCPServer(("", PORT), AsciiHandler)

print "serving at port", PORT
httpd.serve_forever()
Here we could have made port number a parameter but resin.io doesn’t allow a port other than 80 or 8080 to be forwarded, thus it makes little sense to do so.
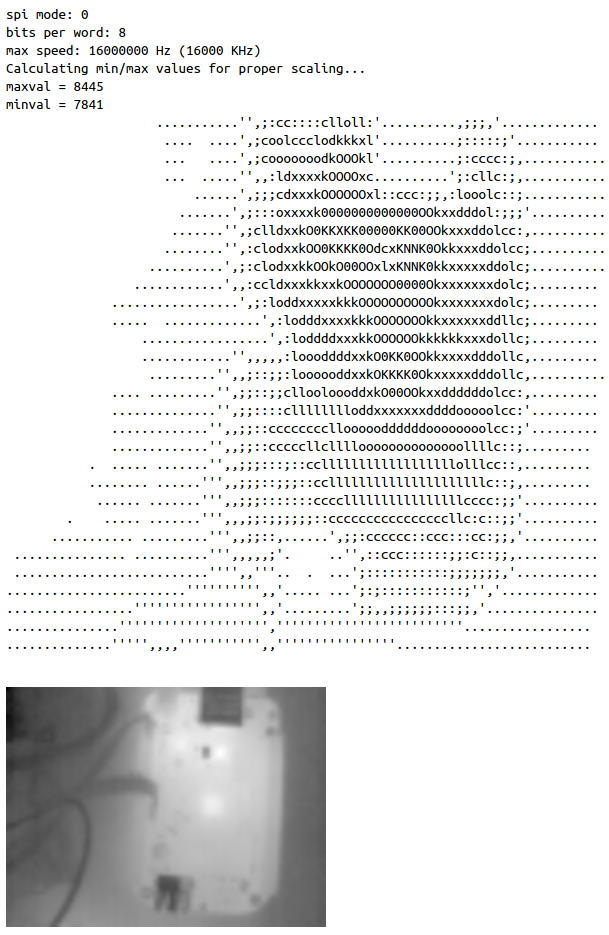
The SPI interaction happens in the subprocess call. This script was originally used for the debugging purposes in the project (this is why the image was converted to an ASCII-art, so that the camera output can be viewed over the SSH or serial connection):
#!/bin/bash

./raspberry_pi_capture
convert image.pgm -depth 16 -resize 400% image.png
convert image.pgm -depth 16 jpg:- | jp2a - --width=80
The image is enlarged so much due to the relatively low resolution of the LWIR camera (80 by 60 pixels) to make it reasonably sized on an HD screen.
The main program retrieves the SPI device path from the environment variables set in the resin.io console:
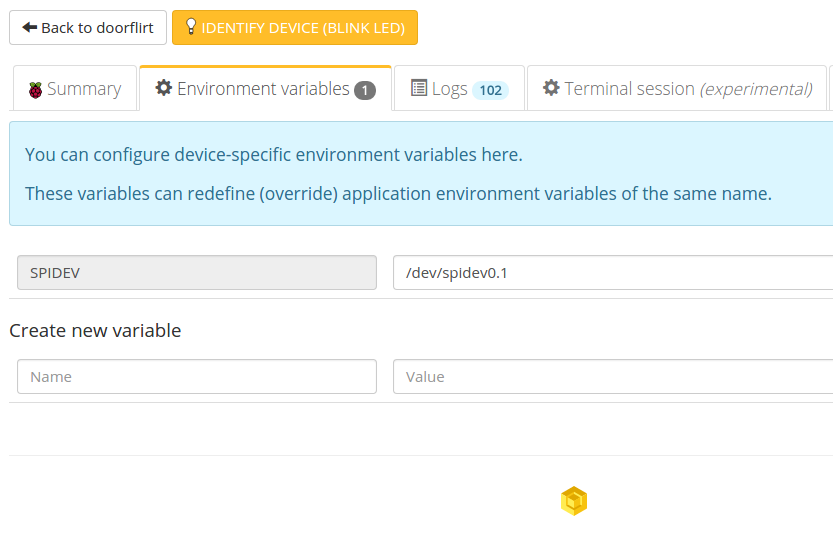
To do this, it uses a standard getenv(3) call from stdlib.h. This was the only change that I made to the original C code.
Here is how the final result looks like in the browser:
The source code is available on Bitbucket
Finally, I would like to say that resin.io is a very nice service that provides Heroku-like interface to the embedded boards and requires little to no changes even for the low-level C code. However, debugging is hard and resin.io is not making it any easier by restricting the SSH access to the host OS.
Happy hacking!
Comments